Installing Hold then Capture on Shopify
How do I install the Hold then Capture or manual capture card feature on Shopify?
Account configuration is required
Whether you are planning to use our test keys or live keys for Hold and Capture integration, you need to activate the feature first by enabling it via the Developers tab (visible only for account owners)
If you are the account owner and you don't see the prompt on your dashboard, feel free to reach out to [email protected]
Hold then Capture on Shopify
Our Hold then Capture card feature is now available on Shopify! This allows you to place a hold on a card payment and then capture or charge it at a later time.
Most businesses that use this feature are food, retail, and delivery merchants that hold the customer's payment upon ordering but capture the funds upon stock verification or order pick-up. Service providers also use this feature to hold funds when a customer books or schedules an appointment. They are then able to charge at a later time once the schedule is confirmed or the service is fulfilled. The great thing about this feature is that you can adapt it to fit your operational processes and business needs.
You can learn more about the Hold then Capture feature by checking out our quick guide.
Installing Hold then Capture on Shopify
This process should take less than 5 minutes and can be done even without any developer experience.
Installing the Hold then Capture card feature on Shopify is divided into 2 parts:
- Installing the Credit/Debit Card via PayMongo Shopify plugin
- Switching to Manual Capture in your Shopify store's settings
Installing the "Credit/Debit Card via Paymongo" Shopify plugin
- Go to the "Credit/Debit Card via PayMongo" plugin listing on the Shopify marketplace by clicking the button below:
- Review the "Credit/Debit Card via PayMongo" plug-in details and click "Add App". If you aren't logged in to your Shopify account, a prompt to log in will appear. Once you're logged in, you will be redirected to the next step.
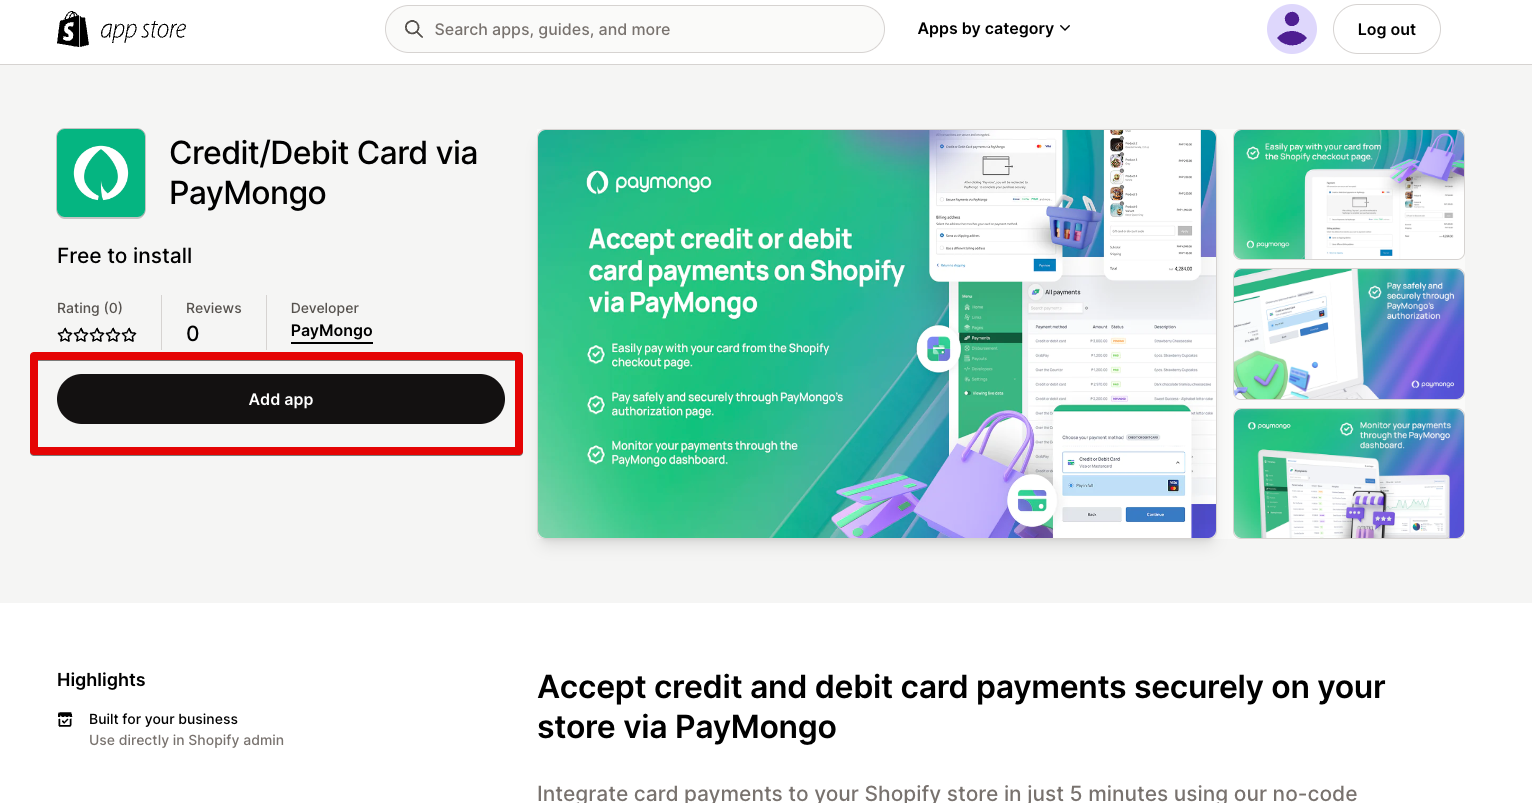
Credit/Debit Card via PayMongo plugin listing
- Review the permission requests and privacy details for the "Credit/Debit Card via PayMongo" plugin and click "Install app" on the top right.
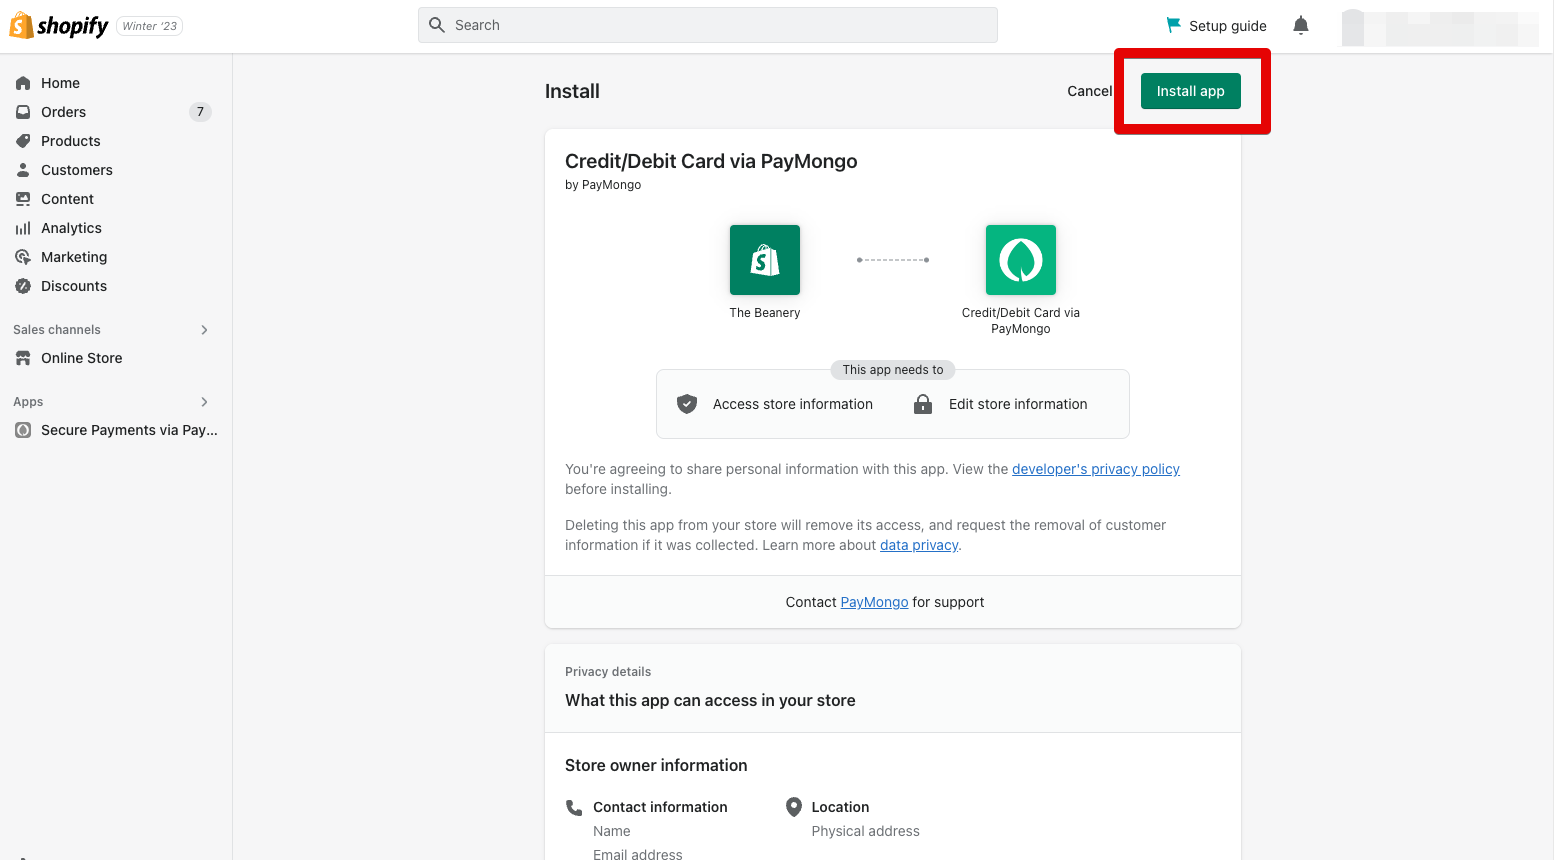
Shopify installation page
- Input your live public key and secret key to connect your PayMongo account to your Shopify store. You will get a success confirmation once done.
Public and Secret API Keys
You can find your live public and secret API keys on the developer tab on the PayMongo Dashboard. Make sure to toggle live mode to get your live keys.
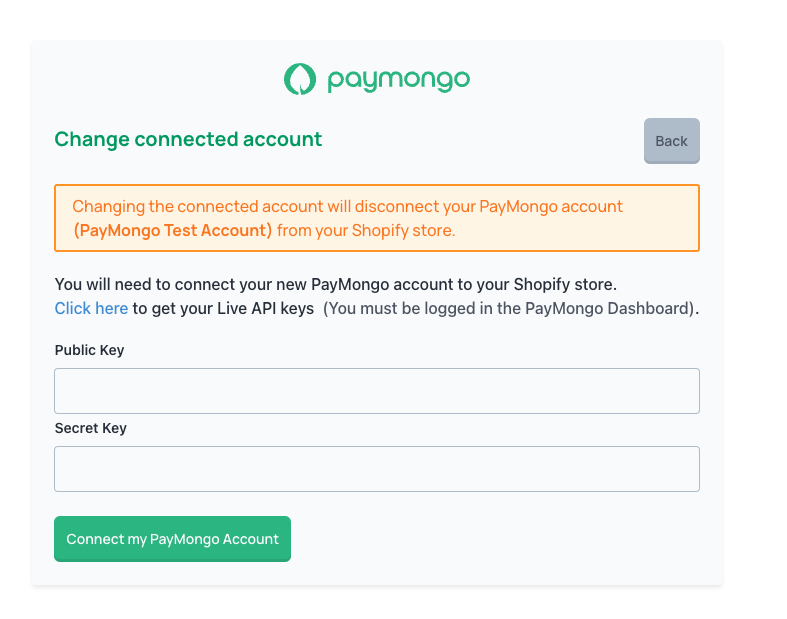
Input your live public and secret keys
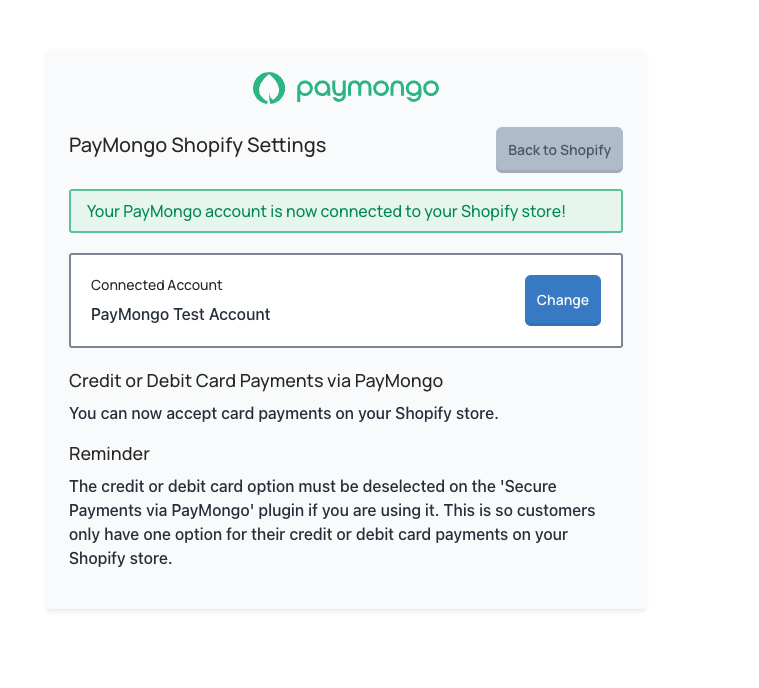
Success confirmation page
- You will be redirected back to your Shopify settings. Click "Activate Credit/Debit Card via PayMongo" to activate the plug-in.
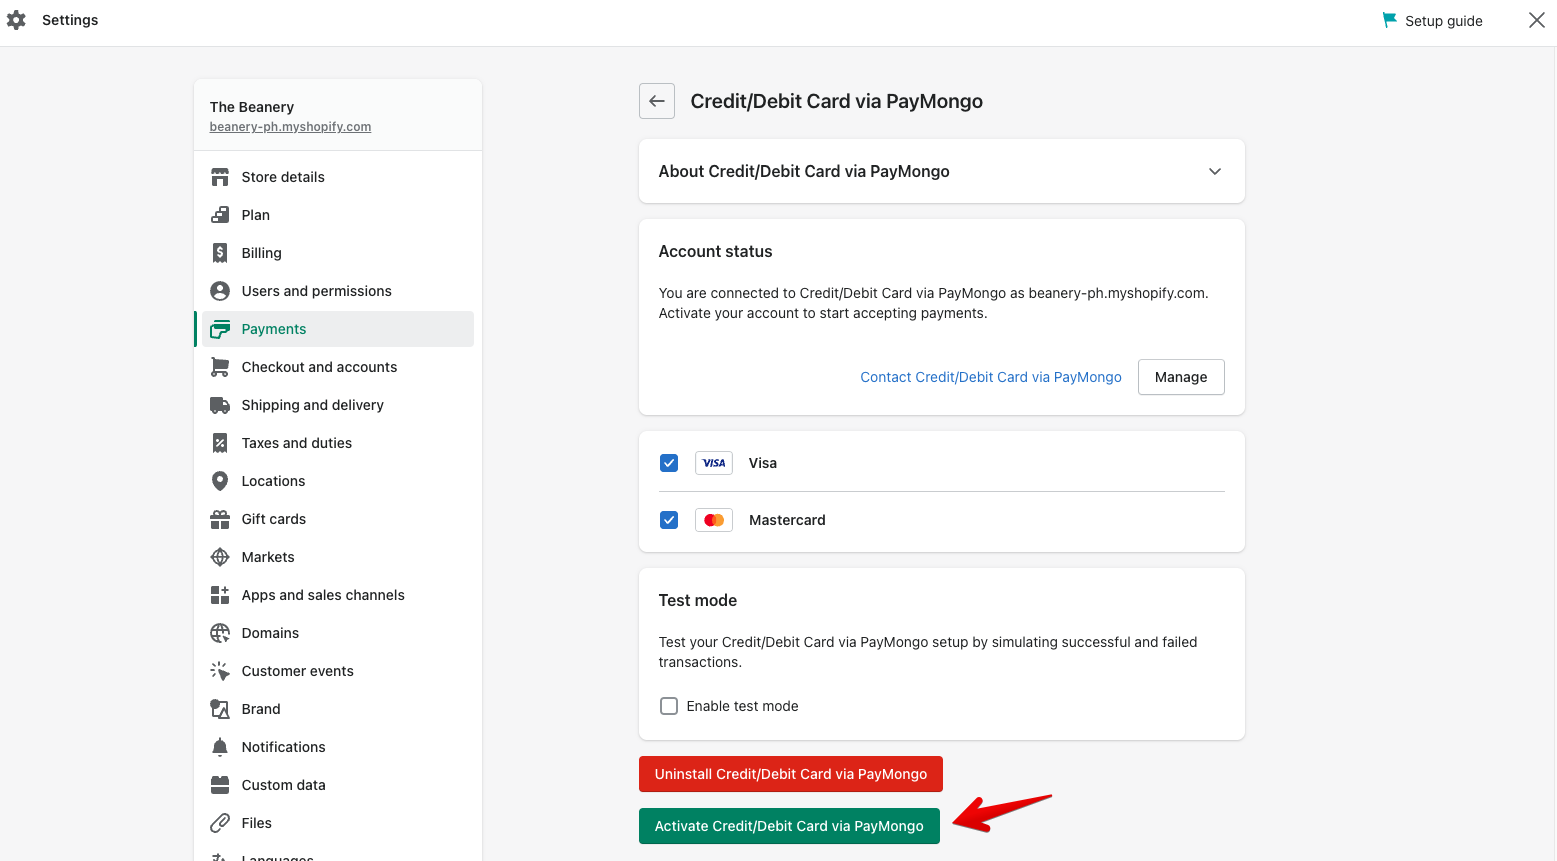
Plugin page in your Shopify settings
"Credit/Debit Card via PayMongo" plug-in is now installed!
You can now process credit/debit card transactions through PayMongo's "Credit/Debit Card via PayMongo" plug-in.
Using PayMongo Shopify plugins
At the moment, PayMongo supports 3 Shopify plugins namely "Credit/Debit Card via PayMongo", "Secure Payments via PayMongo", and "Express Cards via PayMongo".
- "Credit/Debit Card via PayMongo" supports card payments and the Hold then Capture card feature.
- "Secure Payments via PayMongo" supports card, e-wallet, buy now pay later, and our online banking payment options.
- "Express Cards via PayMongo" supports onsite card payments, this means that customers will no longer be redirected to external sites.
If you want to use the Hold then Capture card feature, make sure to disable/deactivate both "Secure Payments via PayMongo" and "Express Cards via PayMongo" plugins to avoid errors and confusion with your customers. Kindly refer to our page on editing payment methods on Shopify.
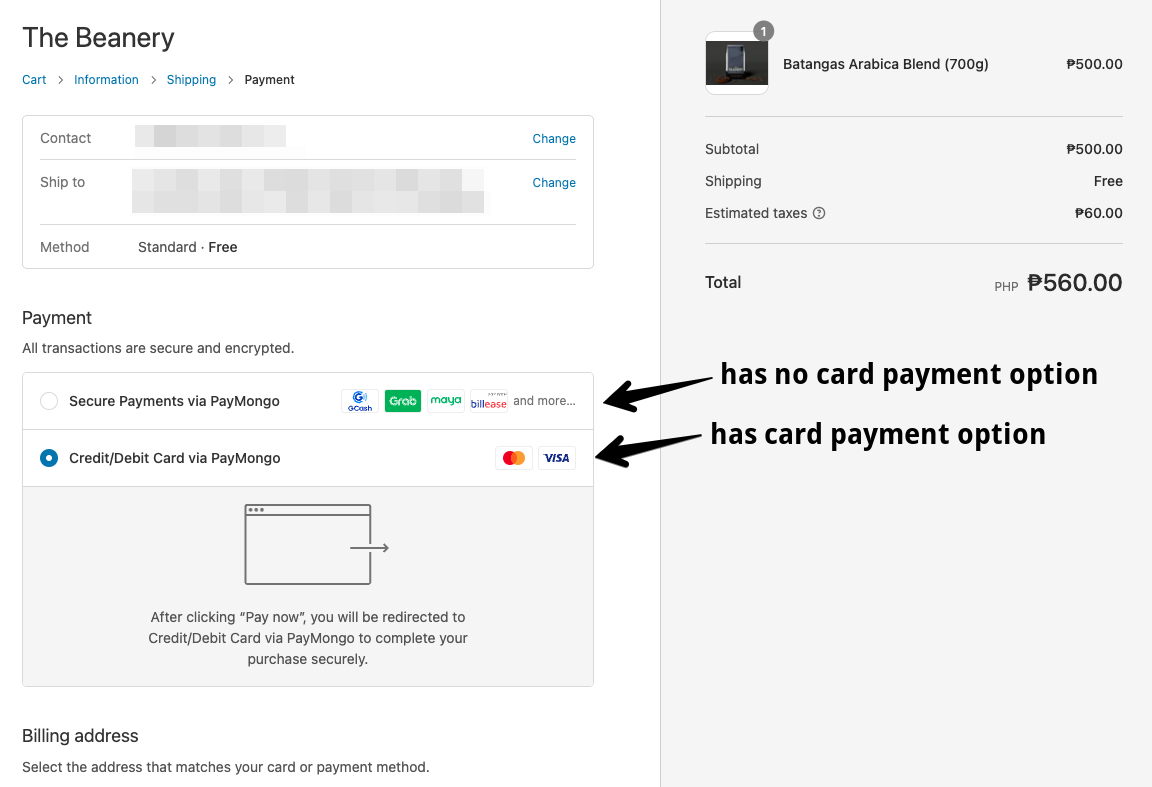
Both PayMongo Shopify plugins on the Shopify checkout page.
Switch to Manual Capture in your Shopify settings
Once you have installed the plugin and your PayMongo account is activated for the Hold then Capture card feature, you can now proceed to switch to Manual Capture in your Shopify settings.
Kindly note: Setting the payment capture to manual will affect all your payment plugins that support manual capture. In PayMongo's case, manual capture (or Hold then Capture) is only available on the "Credit/Debit Card via PayMongo" plugin.
Shopify's guide on this can be found here.
Steps:
- On your Shopify Settings page, go to Payments and click "Manage" under Payment capture. By default, it is set to "Automatic".

Payments page in the Shopify settings
- You can select from the two options:
- "Automatically when order is fulfilled"
- "Manually capture payment for orders"
Once you have chosen an option for the payment capture method, click "Save".
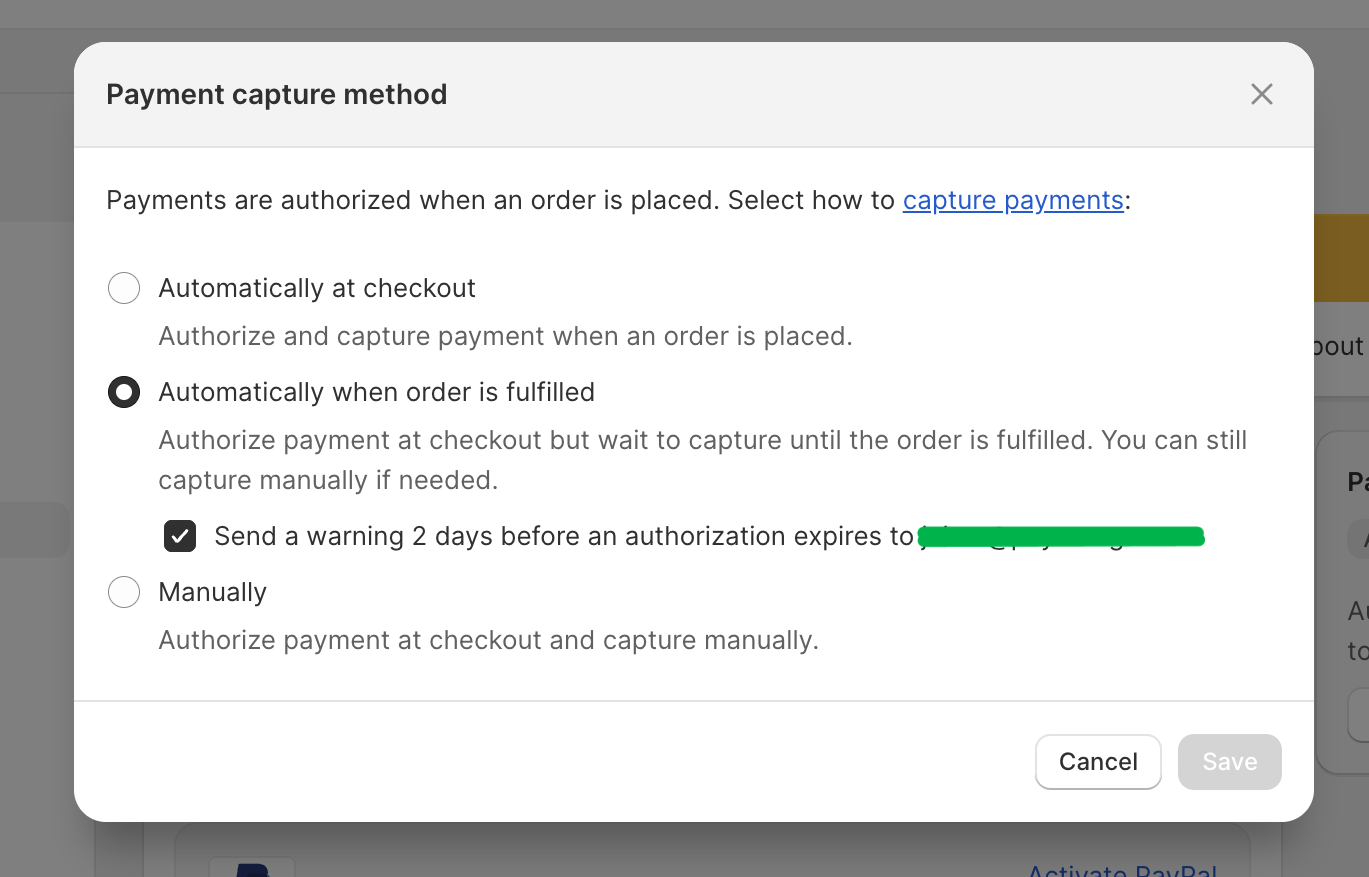
That's it! You have now installed the "Credit/Debit Card via PayMongo plugin" as well as set your Shopify store settings to manually capture payments. You are now ready to use the Hold then Capture feature on Shopify.
To learn more about how to use the Hold then Capture card feature on Shopify, you may refer to the article on our Help Center found below.
Updated 3 months ago
